搜索到
10
篇与
的结果
-
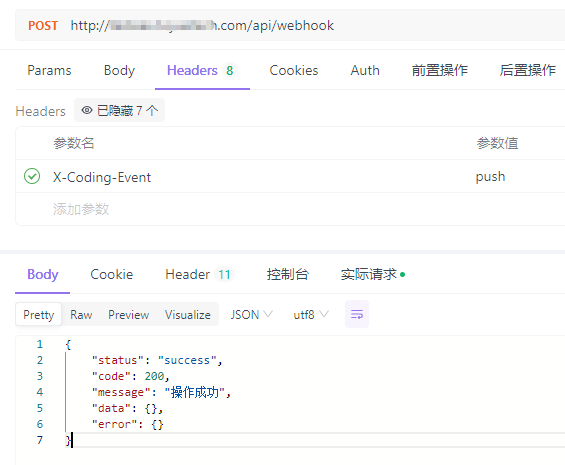
 Laravel对接Coding仓库WebHooks实现自动部署 上下文环境都是基于宝塔的,因为Bash操作都使用的www用户,其他环境并不适用项目执行bash主要使用的是exec函数,项目跑在nginx上。nginx使用的用户为www,所以会有权限问题权限解决:vim /etc/sudoers # 文件内容如下 # www ALL=(ALL) NOPASSWD: /usr/bin/git # + # www ALL=(www) NOPASSWD: /www/server/php/81/bin/php /usr/local/bin/composer install # + 第一行配置:允许用户www以任何用户身份运行/usr/bin/git命令,而无需输入密码。 第二行配置:允许用户www以自身身份运行指定的composer install命令,而无需输入密码。路由:/** * 处理WebHook的请求 * 自动化部署 */ Route::post('webhook', [App\Http\Controllers\Deploy\WebHookController::class, 'handle']); 控制器:解释: 当发现仓库有push操作后,自动执行git pull拉取代码,然后执行composer install安装依赖class WebHookController extends Controller { /** * 监听Coding仓库代码更新操作 * 自动部署最新版项目 * @return \Illuminate\Http\JsonResponse|\Illuminate\Http\Resources\Json\JsonResource */ public function handle(Request $request) { Log::info('接收到Coding WebHook', [$request]); $hookEvent = $request->header('X-Coding-Event'); if (!\Str::contains($hookEvent, 'push')) return \Response::ok(); Log::info("开始执行自动部署任务"); // Git Pull exec('cd .. && sudo git pull' . ' 2>&1', $output, $status); if ($status != 0) { Log::error('拉取代码失败', [$output, $status]); \Response::fail('拉取代码失败', ResponseCodeEnum::SYSTEM_ERROR); } Log::info("拉取代码成功", [$output, $status]); // Composer Install exec('cd .. && /www/server/php/81/bin/php /usr/local/bin/composer install' . ' 2>&1', $output, $status); if ($status != 0) { Log::error('composer安装失败', [$output, $status]); \Response::fail('composer安装失败', ResponseCodeEnum::SYSTEM_ERROR); } Log::info("composer安装成功", [$output, $status]); // 后端完成部署 Log::info("自动部署任务执行完毕"); return \Response::ok(); } }模拟:Coding公司的项目使用腾讯旗下的Coding来管理项目,也是有WebHook的功能引用1.Coding WebHook:https://coding.net/help/docs/project-settings/open/webhook.html2.如何实现Git Push之后自动部署到服务器?:https://blog.csdn.net/ll15982534415/article/details/136669152
 -
 laravel jwt 无感刷新token 为保证和前端交互过程中,用户可以自动刷新token创建一个中间件文件,命名为 RefreshToken<?php namespace App\Http\Middleware; use Auth; use Closure; use Tymon\JWTAuth\JWTAuth; use Tymon\JWTAuth\Exceptions\JWTException; use Tymon\JWTAuth\Http\Middleware\BaseMiddleware; use Tymon\JWTAuth\Exceptions\TokenExpiredException; use Symfony\Component\HttpKernel\Exception\UnauthorizedHttpException; class RefreshToken extends BaseMiddleware { function handle($request, Closure $next) { // 检查此次请求中是否带有 token,如果没有则抛出异常。 $this->checkForToken($request); // 使用 try 包裹,以捕捉 token 过期所抛出的 TokenExpiredException 异常 try { // 检测用户的登录状态,如果正常则通过 if ($this->auth->parseToken()->authenticate()) { return $next($request); } throw new UnauthorizedHttpException('jwt-auth', '未登录'); } catch (TokenExpiredException $exception) { // 此处捕获到了 token 过期所抛出的 TokenExpiredException 异常,我们在这里需要做的是刷新该用户的 token 并将它添加到响应头中 try { /* * token在刷新期内,是可以自动执行刷新获取新的token的 * 当JWT_BLACKLIST_ENABLED=false时,可以在JWT_REFRESH_TTL时间内,无限次刷新使用旧的token换取新的token * 当JWT_BLACKLIST_ENABLED=true时,刷新token后旧的token即刻失效,被放入黑名单 * */ // 刷新用户的 token $token = $this->auth->refresh(); // 使用一次性登录以保证此次请求的成功 Auth::guard('api')->onceUsingId($this->auth->manager()->getPayloadFactory()->buildClaimsCollection()->toPlainArray()['sub']); } catch (JWTException $exception) { // 如果捕获到此异常,即代表 refresh 也过期了,用户无法刷新令牌,需要重新登录。 throw new UnauthorizedHttpException('jwt-auth', $exception->getMessage()); } } // 在响应头中返回新的 token return $this->setAuthenticationHeader($next($request), $token); } }修改App\Http\Kernel.pho文件protected $routeMiddleware = [ //...... 'token.refresh' => \App\Http\Middleware\RefreshToken::class, //...... ];修改routes.api.php文件// 需要 token 验证的接口 $api->group(['middleware' => ['token.refresh','auth.jwt']], function($api) { //....... });修改.env文件#Jwt JWT_SECRET=HSKxIUfwCdJj5gadbqfQo5im9zje95g9 #token有效时间,单位:分钟, 有效时间调整为2个小时 JWT_TTL=120 #为了使令牌无效,您必须启用黑名单。如果不想或不需要此功能,请将其设置为 false。 #当JWT_BLACKLIST_ENABLED=false时,可以在JWT_REFRESH_TTL时间内,无限次刷新使用旧的token换取新的token #当JWT_BLACKLIST_ENABLED=true时,刷新token后旧的token即刻失效,被放入黑名单 JWT_BLACKLIST_ENABLED=true #当多个并发请求使用相同的JWT进行时,由于 access_token 的刷新 ,其中一些可能会失败,以秒为单位设置请求时间以防止并发的请求失败。 #时间为10分钟,10分钟之内可以拿旧的token换取新的token。当JWT_BLACKLIST_ENABLED为true时,可以保证不会立即让token失效 JWT_BLACKLIST_GRACE_PERIOD=6005.备注:JWT token的三个时间,config/jwt.php查看a.有效时间,有效是指你获取token后,在多少时间内可以凭这个token去获取资源,逾期无效。'ttl' => env('JWT_TTL', 60), //单位分钟b.刷新时间,刷新时间指的是在这个时间内可以凭旧 token 换取一个新 token。例如 token 有效时间为 60 分钟,刷新时间为 20160 分钟,在 60 分钟内可以通过这个 token 获取新 token,但是超过 60 分钟是不可以的,然后你可以一直循环获取,直到总时间超过 20160 分钟,不能再获取。这里要强调的是,是否在刷新期可以一直用旧的token获取新的token,这个是由blacklist_enabled这个配置决定的,这个是指是否开启黑名单,默认是开启的,即刷新后,旧token立马加入黑名单,不可在用。'refresh_ttl' => env('JWT_REFRESH_TTL', 20160),c.宽限时间,宽限时间是为了解决并发请求的问题,假如宽限时间为 0s ,那么在新旧 token 交接的时候,并发请求就会出错,所以需要设定一个宽限时间,在宽限时间内,旧 token 仍然能够正常使用// 宽限时间需要开启黑名单(默认是开启的),黑名单保证过期token不可再用 'blacklist_enabled' => env('JWT_BLACKLIST_ENABLED', true) // 设定宽限时间,单位:秒 'blacklist_grace_period' => env('JWT_BLACKLIST_GRACE_PERIOD', 600)
 -
 Laravel+Scout+Elasticsearch实现中文分词搜索功能 一、准备工作1.配置机器ssh连接sudo apt update sudo apt install openssh-server # ssh二、Docker安装ElasticSearch2.1 安装说明在平时工作的时候,开发环境大多数会安装单机ElasticSearch,但生产环境基本会安装ElasticSearch集群版。不过中文搜索,会实现分词器集成,可以采用IK分词器。ElasticSearch采用Kibana实现数据可视化分析也是当前主流,所以我们除了安装ElasticSearch和IK分词器外,还需要安装Kibana。安装实践:1:ElasticSearch单机安装 2:IK分词器安装 3:Kibana安装 2.2 Docker安装ElasticSearch当前ElasticSearch已经到了8.0,新版本都有很多新特性,性能和功能都有大幅提升,我们建议使用较高版本,这里将采用8.6.0版本。 2.2.1 网络创建高版本安装Kibana的时候需要和ElasticSearch在同一网段内,所以采用docker安装首先要确认网段,为了方便操作,我们直接创建一个网络,创建脚本如下:sudo docker network create elastic-series2.2.2 ElasticSearch安装安装ElasticSearch脚本如下:sudo docker run -d \ --name elasticsearch \ -e "ES_JAVA_OPTS=-Xms512m -Xmx512m" \ -e "discovery.type=single-node" \ -v es-data:/usr/share/elasticsearch/data \ -v es-plugins:/usr/share/elasticsearch/plugins \ --privileged \ --network elastic-series \ -p 9200:9200 \ -p 9300:9300 \ elasticsearch:8.6.0命令说明:-e "cluster.name=es-docker-cluster":设置集群名称-e "http.host=0.0.0.0":监听的地址,可以外网访问-e "ES_JAVA_OPTS=-Xms512m -Xmx512m":内存大小-e "discovery.type=single-node":非集群模式-v es-data:/usr/share/elasticsearch/data:挂载逻辑卷,绑定elasticsearch的数据目录-v es-logs:/usr/share/elasticsearch/logs:挂载逻辑卷,绑定elasticsearch的日志目录-v es-plugins:/usr/share/elasticsearch/plugins:挂载逻辑卷,绑定elasticsearch的插件目录--privileged:授予逻辑卷访问权--network elastic-series :加入一个名为elastic-series的网络中-p 9200:9200:端口映射配置Docker安装ElasticSearch下载可能会比较慢,需要耐心等待,效果如下:安装完成后,在浏览器中输入:http://192.168.211.128:9200/即可看到elasticsearch的响应结果:You can Generate a new password using/usr/share/elasticsearch/elasticsearch-setup-passwords auto/interactiveinteractive is where you will have to enter password for all user.auto will just print passwords on the shell.elseYou can turn off x-pack security in elasticsearch.yml2.2.2.1 关闭安全验证1.进入容器内部sudo docker exec -it -u root <container> bash2.安装Vim,为编辑文件做准备apt-get update apt-get install vim3.编辑config/elasticsearch.yml# 追加 xpack.security.enabled: false4.退出并重启容器exit sudo docker restart <container>刷新页面,得到正常响应 3 安装Kibana我们可以基于Http请求操作ElasticSearch,但基于Http操作比较麻烦,我们可以采用Kibana实现可视化操作。2.2.2.2 设置密码详见引用第九条三、Docker安装Kibana3.1 Kibana介绍Kibana 是一个免费且开放的用户界面,能够让您对 Elasticsearch 数据进行可视化,并让您在 Elastic Stack 中进行导航。您可以进行各种操作,从跟踪查询负载,到理解请求如何流经您的整个应用,都能轻松完成。Kibana 让您能够自由地选择如何呈现自己的数据。不过借助 Kibana 的交互式可视化,您可以先从一个问题出发,看看能够从中发现些什么。 可视化界面如下: 3.2 Kibana安装使用Docker安装Kibana非常简单,只需要执行如下命令即可,但是执行命令需要注意Kibana操作的ElasticSearch地址,因为Kibana是需要连接ElasticSearch进行操作的,命令如下:sudo docker run -d \ --name kibana \ -e ELASTICSEARCH_HOSTS=http://192.168.211.128:9200 \ --network elastic-series \ -p 5601:5601 \ kibana:8.6.0命令说明:--network elastic-series :加入一个名为elastic-series的网络中,与elasticsearch在同一个网络中-e ELASTICSEARCH_HOSTS=http://192.168.211.128:9200":设置elasticsearch的地址,因为kibana已经与elasticsearch在一个网络,因此可以用容器名直接访问elasticsearch,也可以写IP地址实现访问。-p 5601:5601:端口映射配置安装的时候如果没有镜像,会下载镜像,效果如下:kibana安装会比较耗时间,也需要耐心等待下载安装完成,如果想实时知道服务安装运行的状态,可以通过查看日志实现,查看日志如下:docker logs -f kibana日志中如果出现了http://0.0.0.0:5601即可访问Kibana后台服务,日志如下:访问http://192.168.211.128:5601效果如下:可以点击Add integrations,添加示例数据,如下图,随意选一个即可,不选其实也是可以的。 3.3 Kibana中文配置我们发现Kibana是英文面板,看起来不是很方便,但Kibana是支持中文配置,所以我们可以把Kibana配置成中文版,便于我们操作。切换中文操作如下:#进入容器 docker exec -it kibana /bin/bash #进入配置文件目录 cd /usr/share/kibana/config #编辑文件kibana.yml vi kibana.yml #在最后一行添加如下配置 i18n.locale: zh-CN #保存退出 exit #并重启容器 docker restart kibana 等待Kibana容器启动,再次访问http://192.168.211.128:5601/效果如下: 四、IK分词器安装我们打开Kibana,点击开发工具,操作如下:输入如下操作,用于查询分词:上图测试代码如下:GET _analyze { "analyzer": "standard", "text": "过去无可挽回,未来可以改变" }表示使用standard对过去无可挽回,未来可以改变进行分词。分词:提取一句话或者一篇文章中的词语。我们在使用ElasticSearch的时候,默认用standard分词器,但standard分词器使用的是按空格分词,这种分词操作方法不符合中文分词标准,我们需要额外安装中文分词器。 4.1 IK分词器介绍IK Analyzer是一个开源的,基于java语言开发的轻量级的中文分词工具包。从2006年12月推出1.0版开始, IKAnalyzer已经推出了多个大版本。最初,它是以开源项目Luence为应用主体的,结合词典分词和文法分析算法的中文分词组件。IK Analyzer则发展为面向Java的公用分词组件,独立于Lucene项目,同时提供了对Lucene的默认优化实现。 ElasticSearch内核其实就是基于Lucene,所以我们可以直接在ElasticSearch中集成IK分词器,IK分词器集成ElasticSearch下载地址:https://github.com/medcl/elasticsearch-analysis-ik/releases 4.2 IK分词器配置下载安装包elasticsearch-analysis-ik-8.6.0.zip后,并解压,目录如下:我们只需要将上面ik拷贝到ElasticSearch的plugins目录中即可,但由于当前服务采用的是docker安装,所以需要将文件拷贝到docker容器的plugins目录才行。操作如下:#将ik文件夹拷贝到elasticsearch容器中 docker cp ik elasticsearch:/usr/share/elasticsearch/plugins #重启容器 docker restart elasticsearch操作效果如下: 4.3 分词测试IK分词器包含两种模式:ik_smart:最少切分ik_max_word:最细切分 前面使用默认的standard分词器,对中文分词非常难用,安装IK分词器后,我们可以使用IK分词器测试,测试代码如下:GET /_analyze { "analyzer": "ik_max_word", "text": "过去无可挽回,未来可以改变" }测试效果如下:我们可以发现对中文的分词效果是比较不错的,但也存在一些不足,比如无可挽回我们希望它是一个词,而可挽回我们希望它不被识别一个词,又该如何实现呢?自定义词典参考引用中的第2个链接五、Laravel集成使用的第三方包matchish/laravel-scout-elasticsearch:https://github.com/matchish/laravel-scout-elasticsearch名称版本php^8.0.2laravel/framework^9.19matchish/laravel-scout-elasticsearch^6.05.1 介绍Laravel Scout 为 Eloquent 模型 的全文搜索提供了一个简单的基于驱动程序的解决方案,通过使用模型观察者,Scout 将自动同步 Eloquent 记录的搜索索引。目前,Scout 附带 Algolia、MeiliSearch 和 MySQL / PostgreSQL (database) 驱动程序。此外,Scout 包括一个「collection」驱动程序,该驱动程序专为本地开发使用而设计,不需要任何外部依赖项或第三方服务。此外,编写自定义驱动程序很简单,你可以使用自己的搜索实现自由扩展 Scout。由于没有自带Elasticsearch的驱动,所以需要第三方包5.1 安装包和配置1.引入包composer require matchish/laravel-scout-elasticsearch2.env设置环境变量SCOUT_DRIVER=Matchish\ScoutElasticSearch\Engines\ElasticSearchEngine ELASTICSEARCH_HOST=192.168.211.128:92003.config/app.php中配置provider'providers' => [ // Other Service Providers \Matchish\ScoutElasticSearch\ElasticSearchServiceProvider::class ],4.发布配置文件php artisan vendor:publish --tag config会新增config/elasticsearch.php文件5.2 更新模型1.更新模型<?php namespace App\Models; use App\Trait\DefaultDatetimeFormat; use Illuminate\Database\Eloquent\Model; use Laravel\Scout\Searchable; class Video extends Model { use DefaultDatetimeFormat, Searchable; protected $fillable = ['img', 'title', 'innerVideoHref', 'innerHref', 'viewNumber', 'likeNumber', 'helpInfo', 'type']; /** * Get the indexable data array for the model. * 我想只根据title来分词检索 * @return array */ public function toSearchableArray() { return $this->only(['title']); } /** * Get the index name for the model. * 指定索引的名称 * @return string */ public function searchableAs() { return 'videos_index'; } /** * 指定 搜索索引中存储的唯一ID * @return mixed */ public function getScoutKey() { return $this->id; } /** * 指定 搜索索引中存储的唯一ID的键名 * @return string */ public function getScoutKeyName() { return 'id'; } }2.修改config/elasticsearch.php<?php return [ 'host' => env('ELASTICSEARCH_HOST','192.168.211.128:9200'), 'indices' => [ 'mappings' => [ 'default' => [ 'properties' => [ 'id' => [ 'type' => 'keyword', ], ], ], // 与上一步的索引名称对应 'videos_index' => [ 'properties' => [ 'title' => [ 'type' => 'text', 'analyzer' => 'ik_max_word', 'search_analyzer' => 'ik_max_word', ], ], ], ], 'settings' => [ 'default' => [ 'number_of_shards' => 1, 'number_of_replicas' => 0, ], ], ], ];3.索引的批量导入php artisan scout:import5.3 使用场景:根据当前播放的视频名称,检索出来十个相关的视频作为推荐public function play($type, $id) { // 直接根据类型和视频ID进行查询 $video = Video::where('type', $type)->where('id', $id)->first(); $videoSeries = Video::search($video->title)->take(10)->get(); dd($videoSeries); }六、遇到的问题6.1 Kibana 服务器尚未准备就绪。在服务器上部署时,访问Kibana出现了查看日志docker logs kibana [2023-01-18T02:05:30.467+00:00][ERROR][elasticsearch-service] Unable to retrieve version information from Elasticsearch nodes. connect ECONNREFUSED 127.0.0.1:9200原因是创建容器时填写的sudo docker run -d \ --name kibana \ -e ELASTICSEARCH_HOSTS=http://127.0.0.1:9200 \ -p 5601:5601 \ kibana:8.6.0这里不可以使用127.0.0.1需要使用私有IP重新创建后即可正常访问6.2 无法访问在虚拟机上部署时按照步骤并开放端口是可以访问9200和5601端口在服务器上按照 创建网络 -> 创建elasticsearch、kibana容器设置网络 的步骤走下来 始终访问不了对应的端口不清楚原因,于是去掉了创建容器时的网络配置引用1.如何在 Ubuntu 20.04 启用 SSH :https://zhuanlan.zhihu.com/p/1457637892.你必须会的Docker安装ElasticSearch教程:https://juejin.cn/post/70741156903402864723.Install Kibana with Docker:https://www.elastic.co/guide/en/kibana/current/docker.html4.Elasticsearch_Installation_asking for username and password:https://stackoverflow.com/questions/71269878/elasticsearch-installation-asking-for-username-and-password5.Releases · medcl/elasticsearch-analysis-ik (github.com):https://github.com/medcl/elasticsearch-analysis-ik/releases6.matchish/laravel-scout-elasticsearch: Search among multiple models with ElasticSearch and Laravel Scout (github.com):https://github.com/matchish/laravel-scout-elasticsearch7.只需五步 集成新版 Elasticsearch7.9 中文搜索 到你的 Laravel7 项目:https://juejin.cn/post/68651885751143301268.php Laravel 使用elasticsearch+ik中文分词器搭建搜索引擎:https://blog.csdn.net/weixin_42701376/article/details/126782529?spm=1001.2101.3001.6650.2&utm_medium=distribute.pc_relevant.none-task-blog-2~default~BlogCommendFromBaidu~Rate-2-126782529-blog-109466440.pc_relevant_multi_platform_whitelistv4&depth_1-utm_source=distribute.pc_relevant.none-task-blog-2~default~BlogCommendFromBaidu~Rate-2-126782529-blog-109466440.pc_relevant_multi_platform_whitelistv4&utm_relevant_index=39.docker中设置elasticsearch、kibana用户名密码、修改密码:https://blog.csdn.net/IT_road_qxc/article/details/121858843
 -
 Laravel Blade分页模板 自带的有点丑,整个模板换掉模板放在/resources/views/vendor/pagination/bootstrap-3.blade.php<nav aria-label="Page navigation example"> <ul class="stui-page text-center clearfix"> <li><a href="{{ $paginator->url(1) }}">首页</a></li> <li><a href="{{ $paginator->previousPageUrl() }}">上一页</a></li> @if($paginator->onFirstPage()) <li class="hidden-xs active"><a href="{{ $paginator->url(1) }}">1</a></li> @for($i = 2;$i <= (($paginator->lastPage() > 5) ? 5 : $paginator->lastPage());$i++) <!-- 判断当前数据总数是否能够渲染当前页面 --> <li class="hidden-xs"><a href="{{ $paginator->appends(request()->query())->url($i) }}">{{ $i }}</a></li> @endfor @elseif(!$paginator->hasMorePages()) @for($i = $paginator->lastPage() - 3;$i <= $paginator->lastPage();$i++) <li class="hidden-xs"><a href="{{ $paginator->url($i) }}">{{ $i }}</a></li> @endfor <li class="hidden-xs active"><a href="{{ $paginator->url($paginator->lastPage()) }}">{{ $paginator->lastPage() }}</a></li> @else <!-- 分页功能显示中间部分 --> @for($i = $paginator->currentPage() - 2; $i <= $paginator->currentPage() + 2; $i++) @if($i > 0) @if($i == $paginator->currentPage()) <li class="hidden-xs active"><a href="{{ $paginator->url($i) }}">{{ $i }}</a></li> @else <li class="hidden-xs"><a href="{{ $paginator->url($i) }}">{{ $i }}</a></li> @endif @endif @endfor @endif <li class="active"><span class="num">{{ $paginator->currentPage() }}/{{ $paginator->lastPage() }}</span></li> <li><a href="{{ $paginator->nextPageUrl() }}">下一页</a></li> <li><a href="{{ $paginator->url($paginator->lastPage()) }}">尾页</a></li> </ul> </nav>样式:.stui-page li { display: inline-block; margin-left: 10px; } ul, ol, li, dt, dd { margin: 0; padding: 0; list-style: none; } .stui-page li .num, .stui-page li a { display: inline-block; padding: 5px 15px; border-radius: 4px; background-color: #fff; border: 1px solid #eee; } .stui-page li.active a, .stui-page li.disabled a { background-color: #f2990d; border: 1px solid #f2990d; color: #fff; } a, h1, h2, h3, h4, h5, h6 { color: #333333; } a, button { text-decoration: none; outline: none; -webkit-tap-highlight-color: rgba(0,0,0,0); }有些class是Boostrap3的在其他文件中使用时,如下@component('vendor.pagination.bootstrap-3', ['paginator' => $videoList]) @endcomponent
 -
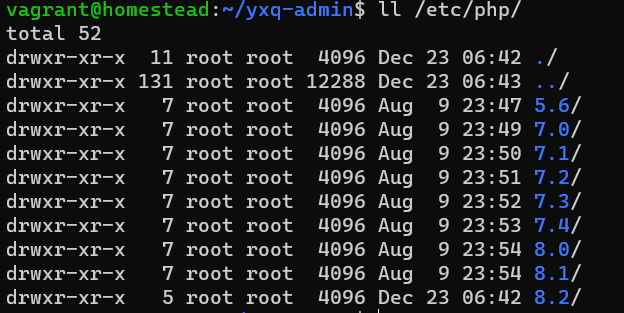
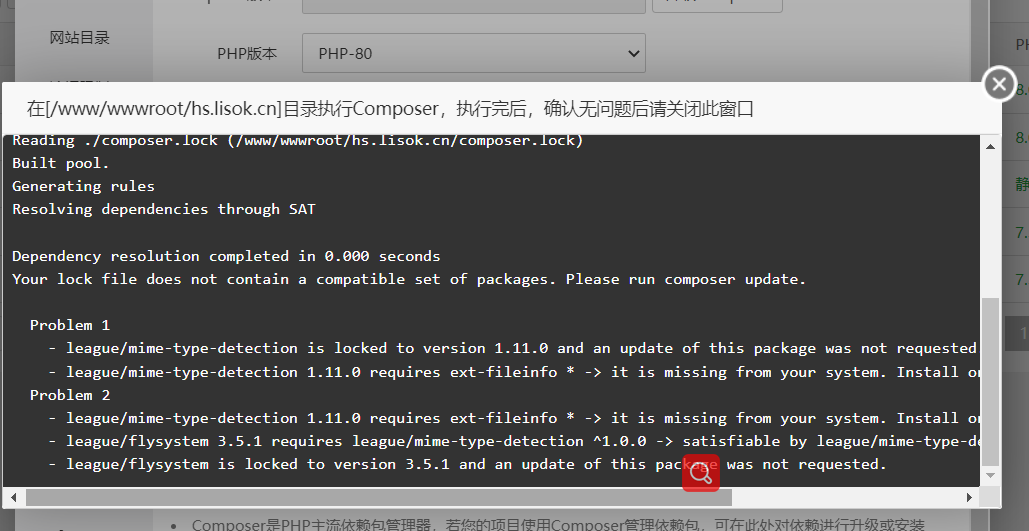
 Homestead中PHP版本问题 Homestead中PHP版本问题1.项目运行时PHP版本1.1 查看Homestead中可用的PHP版本ll /etc/php可用版本是有许多的默认Homestead环境使用的是最新的PHP 8.1.8:1.2 切换项目使用版本在Homestead.yaml文件中进行配置:... sites: - map: yxq.test to: /home/vagrant/yxq-admin/public php: "7.3" ...然后重载一下虚拟机vagrant reload --provision2.Composer使用版本项目是从Github上Clone下来的,在composer update时报了一堆错误看了一下已上线的环境使用的PHP 7.3当我直接使用composer update时,默认会调用环境变量中的PHP 8.1查看一下PHP的环境变量设置whereis php发现各个版本都是有的,只是调用时候要加上版本号所以只能放弃全局的Composer,单独在项目中下载一个composer.pharphp7.3 composer.phar update之后的所有对artisan的操作,都要使用php7.3 artisan ...的方式了,避免因为版本不正确而导致错误发生。PS:可以直接更换环境变量,一劳永逸,我主用的还是最新版 所以没必要换了。# 安装完新项目的依赖后,要拷贝一下.env vagrant@homestead:~/yxq-admin$ cp .env.example .env # 生成key vagrant@homestead:~/yxq-admin$ php7.3 artisan key:generate Application key set successfully.接下来数据库迁移修改一下.envDB_DATABASE=yxq DB_USERNAME=homestead DB_PASSWORD=secret执行迁移php7.3 artisan migrate3.Vagrant常用命令序号命令解释1vagrant up启动虚拟机2vagrant ssh登录虚拟机 通过 exit 退出3vagrant status查看虚拟机状态4vagrant halt关机5vagrant destroy删除虚拟机6vagrant reload --provision修改配置文件后重载引用1.Laravel Homestead:https://laravel.com/docs/9.x/homestead#main-content2.composer.phar Download: https://getcomposer.org/download/3.多版本php环境,指定composer 使用的php版本: https://segmentfault.com/q/10100000126268834.homestead 添加新站点:https://www.cnblogs.com/cjjjj/p/9420844.html
 -
 How to set up debugging with PhpStorm and Homestead 20-xdebug.inizend_extension=xdebug.so xdebug.mode = debug xdebug.discover_client_host = false xdebug.client_host = 10.0.2.2 xdebug.client_port = 9000 xdebug.max_nesting_level = 512 xdebug.start_with_request = trigger xdebug.idekey = PHPSTORM引用1.How to set up debugging with PhpStorm and Homestead:https://dev.to/daniel_werner/how-to-set-up-debugging-with-phpstorm-and-homestead-484g2.How to setup Xdebug with PhpStorm and Laravel Homestead:https://www.youtube.com/watch?v=F7PKs_U4mQg&t=351s&ab_channel=JeezyCarry
 -

-
 通过Fiddler抓包调试PHP内Guzzle网络请求 场景最近在做设计素材网解析下载,后台框架使用Laravel网络请求框架使用HTTP ClientLaravel provides an expressive, minimal API around the Guzzle HTTP client, allowing you to quickly make outgoing HTTP requests to communicate with other web applications. Laravel's wrapper around Guzzle is focused on its most common use cases and a wonderful developer experience.一、Fiddler配置HTTP 抓包Fiddler 主菜单 -> Tools -> Fiddler Options-> Connections-> 选中 Allowremote computers to connect装有 fiddler 的机器,找出能远程访问的 IP,一般局域网内也就是本机 IP。被抓包调试的设备在网络代理那里启用代理 -> 代理 IP 就是上面说的 IP-> 端口号默认为 8888 (可以在 fiddler 中 Connections 标签页修改)这样就 OK 了。HTTPS 抓包Fiddler 主菜单 -> Tool->Fiddler Options->HTTPS -> 选中 decrypt https traffic 和 ignore server certificate errors会提示你安装证书,必要要安装。然后同 HTTP 抓包一样操作二、代码配置代理$response = Http::withCookies(cookieStrToArray($cookie->content), 'nipic.cn') ->withOptions( [ 'proxy' => '127.0.0.1:8888', // 端口为Fiddler中配置的端口 'verify' => false, // 禁用证书验证 ]) ->withHeaders([ 'Accept' => 'text/html,application/xhtml+xml,application/xml;q=0.9,image/avif,image/webp,image/apng,*/*;q=0.8,application/signed-exchange;v=b3;q=0.9', 'Accept-Encoding' => 'gzip, deflate, br', ]) ->withUserAgent('Mozilla/5.0 (Windows NT 10.0; Win64; x64) AppleWebKit/537.36 (KHTML, like Gecko) Chrome/105.0.0.0 Safari/537.36') ->get("https://down.nipic.cn/download?id=$resourceId")->body();再次请求可以看到Fiddler拦截到了请求。三、使用Telescope需要安装一下对应的依赖# You may use the Composer package manager to install Telescope into your Laravel project: composer require laravel/telescope --dev # After installing Telescope, publish its assets using the telescope:install Artisan command. After installing Telescope, you should also run the migrate command in order to create the tables needed to store Telescope's data: php artisan telescope:install php artisan migrate只有使用HTTP Client才会被记录,而且请求和响应的记录信息不太全,所以使用Fiddler还是更好的选择。引用1.Fiddler 抓包调试 : https://www.chengxiaobai.cn/skills/fiddler-capture-debugging.html2.laravel中使用Guzzle 报 unable to get local issuer certificate错误信息:https://blog.csdn.net/worldmakewayfordream/article/details/1143020203.Guzzle 6 请求选项 :https://guzzle-cn.readthedocs.io/zh_CN/latest/request-options.html4.如何获取php向其它网站发起了什么请求,有什么办法?: https://learnku.com/laravel/t/673455.HTTP Client : https://laravel.com/docs/9.x/http-client6.Laravel Telescope : https://laravel.com/docs/9.x/telescope
 -
 Laravel Breeze(vue) and Homestead - npm run dev and HMR not working Laravel Breeze(vue) and Homestead - npm run dev and HMR not workingQuestionI followed the instructions from the documentation:Homestead: https://laravel.com/docs/9.x/homestead#installation-and-setupBreeze with Vue and inertia: https://laravel.com/docs/9.x/starter-kits#breeze-and-inertiaWhen I run npm run build everything works fine. I can visit my new app over http://homestead.test/. When I try to use the dev server with hot reload npm run dev, the debug console in my browser (host) tells:GET http://127.0.0.1:5173/@vite/client net::ERR_CONNECTION_REFUSED GET http://127.0.0.1:5173/resources/js/app.js net::ERR_CONNECTION_REFUSEDI already tried to change my package.json file to from "dev": "vite", to "dev": "vite --host homestead.test", but this only results in the errorsGET http://homestead.test:5173/@vite/client net::ERR_CONNECTION_REFUSED GET http://homestead.test:5173/resources/js/app.js net::ERR_CONNECTION_REFUSEDIn app.blade.php the scripts are imported with @<!DOCTYPE html> <html lang="{{ str_replace('_', '-', app()->getLocale()) }}"> <head> <meta charset="utf-8"> <meta name="viewport" content="width=device-width, initial-scale=1"> <title inertia>{{ config('app.name', 'Laravel') }}</title> <!-- Fonts --> <link rel="stylesheet" href="https://fonts.bunny.net/css2?family=Nunito:wght@400;600;700&display=swap"> <!-- Scripts --> @routes @vite('resources/js/app.js') @inertiaHead </head> <body class="font-sans antialiased"> @inertia </body> </html>@routes seems to be a part of the Laravel Ziggy package. No error from this side.But the @vite('resources/js/app.js') and @inertiaHead are throwing errors. These directives link to a wrong destination.How to solve this?AnswerI've found the solution. Add the server part in your vite.config.js. And add the app.css to the inputsimport { defineConfig } from 'vite'; import laravel from 'laravel-vite-plugin'; import vue from '@vitejs/plugin-vue'; export default defineConfig({ server: { hmr: { host: "192.168.56.56", }, host: "192.168.56.56", watch: { usePolling: true, }, }, plugins: [ laravel({ input: ['resources/js/app.js', 'resources/css/app.css'], refresh: true, }), vue({ template: { transformAssetUrls: { base: null, includeAbsolute: false, }, }, }), ], });Quote1.Laravel Breeze (vue) and Homestead - npm run dev and HMR not working : https://stackoverflow.com/questions/73506437/laravel-breeze-vue-and-homestead-npm-run-dev-and-hmr-not-working
 -
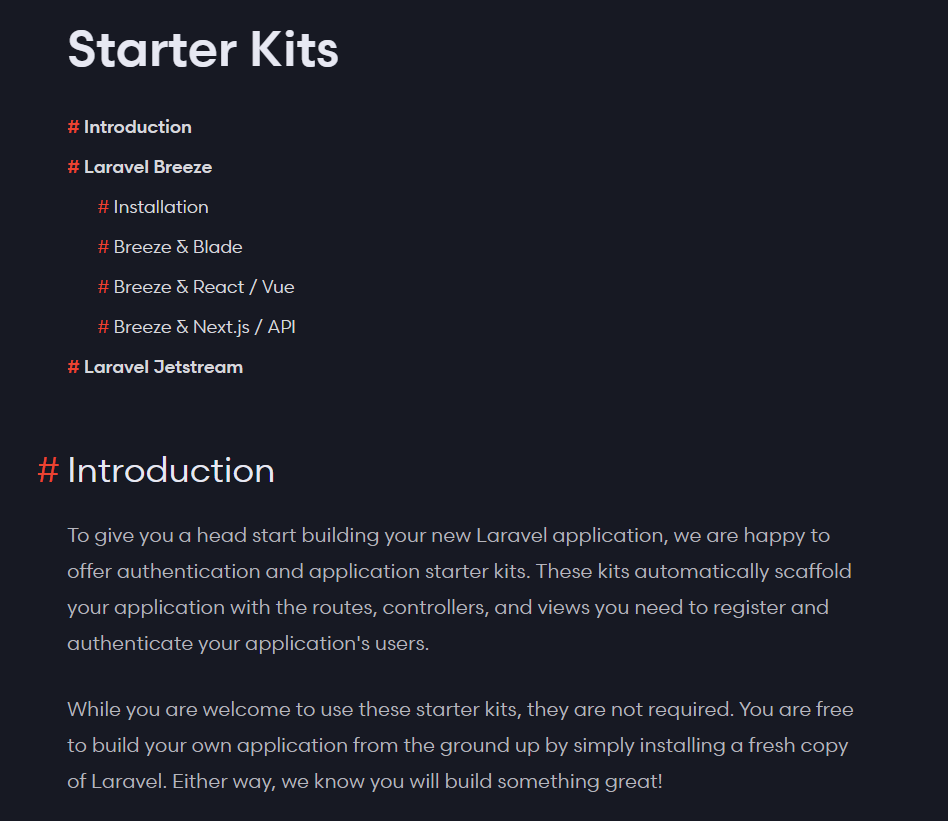
 初探Laravel Starters Kits的Breeze&Vue 简介Breeze 是官方推荐的起手套装,内建有登入、注册、忘记密码等常用的用户功能,另外可以选择使用 Vue 或者 React 来建立SPA单页页面。首先,Breeze 适用于专门初始化的工具,如果项目已经开发到一半的话可能会有冲突,所以不适用。最好建立一个初始化的工程。创建工程1.创建项目如果是8或更低的版本中前端资源打包使用了mix执行npm install 和 npm run dev后,页面无法正常解析,属于是坑了解决方案:https://learnku.com/laravel/t/69192所以避免踩坑直接采用了最新版的v 9.3.3的Laravelcomposer create-project laravel/laravel=9.*.* --prefer-dist projectName2.安装breezecomposer require laravel/breeze --dev官方文档:https://laravel.com/docs/9.x/starter-kits#laravel-breeze-installation3.安装breeze & React/Vuephp artisan breeze:install vue # Or... php artisan breeze:install react php artisan migrate npm install npm run dev4.查看效果需要跑两个控制台图中左侧运行服务端:php artisan serve右侧运行前端:npm run dev访问http://127.0.0.1:8000查看!自带了登录、注册功能,单页应用全程无刷新,nice!架构分析探索一下 Laravel 是如何实现这些的1.浅析路由和组件首先看到 routes/auth.php,这里定义了使用者登录之前的页面路由与 API,包含注册、登入登出、忘记密码等。以 Get/login 为例,由 AuthenticatedSessionController 的 create 方法处理请求后回传登录页面。 在这之前加上了 guest 这个 middleware,如果请求带有已登录的状态,则不回传页面而直接跳到首页。Route::middleware('guest')->group(function () { // ... Route::get('login', [AuthenticatedSessionController::class, 'create']) ->name('login'); // ... });看看 AuthenticatedSessionController 的 create方法做了什么/** * Display the login view. * * @return \Inertia\Response */ public function create() { return Inertia::render('Auth/Login', //resources\js\Pages\Auth\Login.vue 页面组件 // 页面组件的Props参数 [ 'canResetPassword' => Route::has('password.request'), 'status' => session('status'), ]); }再看一下对应的Vue组件<script> defineProps({ canResetPassword: Boolean, status: String, }); </script> <template> ... <div v-if="status" class="mb-4 font-medium text-sm text-green-600"> {{ status }} </div> ... ... <Link v-if="canResetPassword" :href="route('password.request')" class="underline text-sm text-gray-600 hover:text-gray-900"> Forgot your password? </Link> ... </template>瞬间明白,php中可以直接返回信息回传给Inertia.js进行渲染页面,组件中进行defineProps声明后即可使用。2.Inertia原理這邊簡單說下 Inertia.js 的運作方式,最初連上網站的時候,會回傳一個帶有 Inertia 功能的全頁應用,而這個應用裡所有的 link 都會經過 Inertia 的處理,當點擊 link 時並不會直接跳轉網址而是變成發送一個 XHR 到 Laravel ,並經由 API 回傳 Inertia 渲染的畫面元件,進行畫面的更新。而說是 API 渲染元件其實有點不太準確,收到請求後 Inertia Render 會將 Vue/React 元件轉換成 JSON 並回傳(不是 Html),再經由前端的 Inertia 解析後重新渲染部分的畫面,達到類前端 App 的效果,所以實際的渲染還是發生在前端,API 只是提供資料。另外這個方法前端是沒有路由器的,Laravel 伺服器提供畫面的路由器替代了這部分。本段来自:https://ithelp.ithome.com.tw/articles/10267034?sc=iThelpR3.Vue目录结构进一步学习留个官方文档入口: https://laravel.com/docs/9.x/vite引用1.Laravel8.5使用套件laravel breeze ,所有页面版式都未正确加载:https://learnku.com/laravel/t/691922.Laravel Starter kits :https://laravel.com/docs/9.x/starter-kits#introduction3.使用 Breeze 建立基礎專案框架:https://ithelp.ithome.com.tw/articles/10267034?sc=iThelpR4.Migrating from Laravel Mix to Vite:https://github.com/laravel/vite-plugin/blob/main/UPGRADE.md#migrating-from-laravel-mix-to-vite5.Bundling Assets (Vite):https://laravel.com/docs/9.x/vite


